Low Carb Cheesecake : Easy and Delicious Recipe
Low Carb Cheesecake : Easy and Delicious Recipe
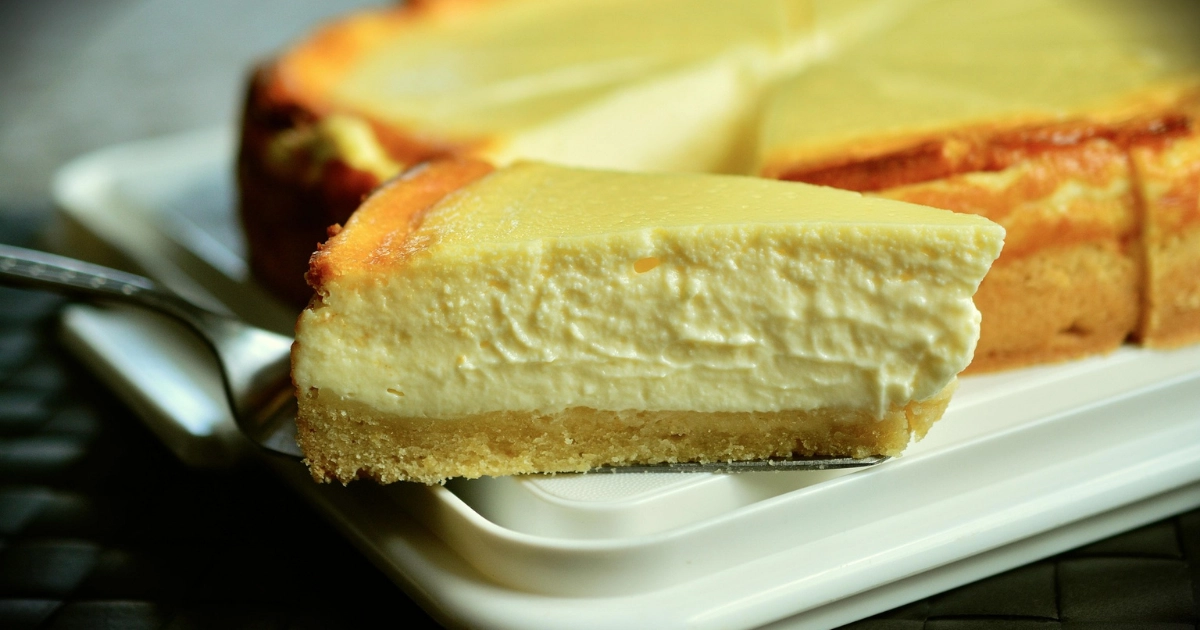
You may want a Low Carb Cheesecake , and baking one at home can fit that goal. This keto-friendly dessert uses familiar ingredients and gives you control over portions.
Net carbs = total carbohydrate minus fiber, with some calculation methods also subtracting eligible sugar alcohols. Ingredient brands and serving size affect any nutrition estimate, so your result may differ from another baker’s.
A low-carb dessert is not automatically a match for every person’s dietary needs. Check the ingredients and portion size against your own needs, especially when tracking carbohydrates closely.
You can make a smooth, rich version at home with a few familiar baking ingredients. Start with the recipe card, then choose the sweetener and crust that suit your taste.
Key Takeaways
- Use a 9-inch springform pan for the recipe.
- Choose a granulated low-carb sweetener with clear baking guidance.
- Mix the filling gently after adding the eggs.
- Let the center wobble slightly when baking ends.
- Chill the cake for at least 6 hours before slicing.
How Do You Make low carb cheesecake at Home?
This keto cheesecake recipe uses an almond-flour crust and a cream-cheese-based filling. For 12 slices, use a 9-inch springform pan and bake the cake at 325°F.
Plan several hours for chilling after baking, since the filling needs time to firm up. Lemon juice adds a mild tang, but you can leave it out.
Use a 9-inch springform pan and allow several hours for chilling. Lemon juice is optional.
Ingredients for a 9-Inch low carb cheesecake
Measure the crust and filling ingredients before you begin. Room-temperature cream cheese blends more easily into a smooth batter.
- Crust: 1 1/2 cups almond flour
- Crust: 5 tablespoons melted butter
- Crust: 2 tablespoons granulated low-carb sweetener
- Filling: 24 ounces cream cheese
- Filling: 3/4 cup granulated low-carb sweetener
- Filling: 1 cup sour cream
- Filling: 3 large eggs
- Filling: 2 teaspoons vanilla extract
- Filling: 1 tablespoon lemon juice, optional
Quick Method and Recipe Yield
- Line and grease a 9-inch springform pan, then press the crust mixture evenly into its base.
- Pre-bake the crust, then let it cool while you mix the filling.
- Beat the filling ingredients until smooth, adding the eggs one at a time.
- Pour the filling into the pan and bake at 325°F until the edges set.
- Cool the cake gradually, then chill it for at least 6 hours before slicing.
This easy homemade dessert makes 12 slices, though the size of each slice affects its net carbs. Sweetener choices can also change the taste and texture.
Which Sweetener Works Best in low carb cheesecake?
A low-carb sweetener can taste smooth in the bowl yet feel different after baking and chilling. Check the label, because each granulated low-carb sweetener has its own sweetness and measuring directions.
Do not assume every product measures cup-for-cup like sugar. Products vary, so follow the package’s sugar-equivalent guidance for the amount used in your recipe.
Granulated Erythritol-Based Blends
Erythritol-based blends often use other sweeteners to reach a sugar-like level of sweetness. Some leave a cooling feel on your tongue, especially in a chilled dessert.
These blends may also recrystallize as the cake cools. That change can create a faintly gritty bite, even when the batter looked smooth before baking.
Allulose and Monk Fruit Blends
Allulose browns more readily than erythritol and can make baked goods softer. That softer texture may change how a slice holds its shape.
Monk fruit products are often blended with another sweetener. Read the ingredient label and package conversion guidance before measuring, since the blend affects both sweetness and texture.
| Sweetener type | Sweetness or measuring note | Browning and texture | Practical tradeoff |
| Erythritol-based blends | Check sugar-equivalent directions | May feel cooling or recrystallize | Can develop a gritty finish |
| Allulose | Use package guidance | Browns readily; may soften baking | Can yield a softer cake |
| Monk fruit blends | Check the blend and conversion | Varies by added sweetener | Label details matter |
A sugar substitute that works in one brand may not measure the same way in another. Once you choose a product, the crust is another source of flavor and texture variation.
Should You Use an Almond Flour Crust or Go Crustless?
An almond flour crust gives you a familiar nutty base, while a crustless cheesecake makes a softer-edged slice. Your choice affects both flavor and how neatly each piece lifts from the pan.
“No carb desserts” is not a literal description of this recipe. Cream cheese and other ingredients still contribute carbohydrates, even when you skip the crust.
Almond Flour and Pecan Crusts
For a 9-inch pan, the almond flour crust uses 1 1/2 cups almond flour and 5 tablespoons butter. It forms a mild, crumbly base beneath the cream cheese filling.
You can grind pecans and use them in place of almond flour. The pecan crust tastes richer, and its texture may be more coarse or tender.
When to Skip the Crust
A crustless cheesecake can suit you when you want less crunch or prefer the filling on its own. It still needs a well-prepared pan to release cleanly.
The table compares the three approaches for a 9-inch pan. Pick the one that best fits the texture and flavor you want.
| Crust choice | 9-inch pan ingredients or setup | Finished texture | Best fit |
| Almond flour | 1 1/2 cups almond flour; 5 tablespoons butter | Nutty, firm, crumbly base | Classic cheesecake slice |
| Ground pecans | Ground pecans in place of almond flour | Richer flavor; texture varies | A deeper nut taste |
| Crustless | Prepared 9-inch pan; no crust | Soft edge; filling-only slice | Skipping a crust |
Each choice changes the bite, but none removes all carbohydrates from the cake. Prepare the pan using your chosen crust approach before mixing the filling.
How Should You Prepare the Pan and Crust?
Line the base of your springform pan before adding the crust mixture. Even pressure helps the crust hold together and gives you a cleaner edge when serving.
Pack the crust evenly, since thin spots can leave a crumbly edge. A crustless version still needs a well-prepared pan so the cake releases more neatly.
- Lay a round of parchment paper over the springform pan base.
- Grease the pan sides lightly, including the seam near the base.
- Mix the almond flour, melted butter, and sweetener until evenly moistened.
- Press the mixture across the base with even thickness, including around the edge.
- Pre-bake the crust for about 10 minutes at 325°F, then cool it.
If you use ground pecans, press them with the same care as almond flour. For a crustless cake, skip the crust and keep the prepared pan ready.
A spoon or flat-bottomed cup can help press the mixture into an even layer. Avoid pressing one area much harder than the rest, or the crust may bake unevenly.
Once the crust has cooled, move from the prepared pan to mixing a smooth filling.
How Do You Mix a Smooth Cream Cheese Filling?
Let the cream cheese soften before you start mixing. Room-temperature ingredients blend with less effort and help you make a smooth cheesecake batter.
Cold cream cheese can stay lumpy even when the other ingredients have reached room temperature. Scrape the bowl as needed, so unmixed cream cheese does not hide along its sides.
Bring the Ingredients to Room Temperature
Set the cream cheese out until it feels soft enough to press with a finger. Sour cream and eggs also blend more evenly when they are not cold.
Beat the cream cheese first, then add the sweetener and sour cream. Mix until the filling looks smooth, stopping to scrape the bowl and beaters when needed.
Cold cream cheese is a common exception to the room-temperature rule. It can form small lumps that remain in the batter, even if your eggs and sour cream feel warm.
Mix Gently After Adding the Eggs
Add the eggs one at a time on low speed. Let each egg blend in before adding the next, then mix in the vanilla and optional lemon juice.
Excessive whipping can fold extra air into the cream cheese filling. That air can expand in the oven and contribute to cracks as the cake bakes and cools.
Stop mixing as soon as the filling looks even. You do not need to whip it until it becomes fluffy or light.
Scrape the bowl one last time and check for streaks of cream cheese. Hand the smooth batter to the baking method, where gentle heat helps it set.
How Do You Bake Cheesecake Without Cracks?
The center should still move slightly when the cheesecake is done. A gentle wobble means the cake can finish setting as it cools.
Do not bake until the center feels completely firm in the oven. A 9-inch cheesecake commonly takes about 55-70 minutes at 325°F, though ovens, pans, and batter temperature affect timing.
Water Bath or No Water Bath
A water bath surrounds the pan with hot water and moderates the heat around the filling. It can help limit cracks, but it is not essential.
Wrap the springform pan tightly before setting it in hot water. A snug wrap helps reduce the chance that water leaks into the crust.
Without a water bath, place the pan directly in the oven and watch the cake near the end of its usual baking range. The top should not turn dark or deeply browned.
Signs the Center Is Done
Look for a set outer ring and a center that moves slightly when you nudge the pan. The middle should not slosh like liquid.
- The outer ring looks set, not wet.
- The center has a small, gentle wobble.
- No liquid movement crosses the middle.
- The top is not dark or deeply browned.
Oven timing is a guide, not a reason to keep baking until every part feels firm. That choice can dry the edges and raise the risk of cracks.
When the outer ring holds and the center still wobbles, stop baking. Gradual cooling comes next and helps the set filling adjust to a cooler temperature.
How Should You Cool and Chill the Cheesecake?
The cake has come out of the oven, but it is not ready to slice. Gradual cooling lets the filling settle before the refrigerator firms it for serving.
Chill the cheesecake for at least 6 hours, with overnight chilling as the more reliable choice for clean slices. Cutting while the center is warm can make a properly baked cake seem under-set.
Cool It Gradually
Turn off the oven and leave the door slightly open. Let the cake rest inside for a short time as the oven temperature begins to fall.
Move the pan to a wire rack and let the cake cool further. Avoid a fast change from hot oven air to a cold room, which can stress the top.
Once the cake has cooled, cover it before refrigerating. A cover keeps the surface from picking up odors and helps protect it from drying out.
Chill Until Fully Set
Give the cheesecake at least 6 hours in the refrigerator. Overnight chilling is more reliable when you want firm slices that hold their shape.
The center may seem soft before it has chilled long enough. If you cut while it is still warm, the slice can look loose even when the cake baked properly.
Wait until the whole cake feels cold before portioning it. A fully chilled cake is easier to cut into even pieces, which helps when estimating net carbs per slice.
Once the cake is fully chilled, portion it evenly and estimate carbohydrates using the ingredients and serving size you actually used.
How Can You Estimate Net Carbs per Slice?
The most useful net carbs per slice estimate comes from your actual ingredient labels and slice size. Use your own labels, since brands can list different carbohydrate amounts.
Add the ingredient totals, account for fiber and eligible sugar alcohols, then divide by equal slices. Your calculation method determines which sugar alcohols qualify for subtraction.
Start with the carbohydrate amounts for the specific products you used. Add them together, then subtract fiber according to your chosen method.
Some methods also subtract eligible sugar alcohols. Ingredient labels and calculation rules matter, so use one approach consistently rather than mixing methods.
Divide the adjusted total by 12 only if you cut the cake into 12 equal slices. A larger portion has more carbohydrates than a smaller one.
Brand labels can change the estimate even when you use the same recipe. Toppings also count, so include any berries, sauces, or other additions in your serving.
The phrase “diabetic cheesecake” does not mean the recipe suits every individual. A low-carb recipe is not automatically suitable for every person with diabetes or other dietary needs.
Once you have an estimate, keep portions consistent and store the finished dessert safely.
How Do You Serve and Store Low-Carb Cheesecake?
Cut the chilled cake into even slices before adding toppings. Measured portions help you keep serving size consistent and estimate net carbs per slice more clearly.
Keep cheesecake at 40°F or below in the refrigerator, and use it within 3-4 days. Do not leave this perishable dessert at room temperature for more than 2 hours.
Serving Ideas and Portioning
For clean slices, warm a sharp knife under hot water, then wipe it dry. Wipe the blade between cuts to keep filling from dragging across the next slice.
Add toppings after portioning, and measure them rather than scattering them freely. A few berries or a spoonful of sauce can change the carbohydrates in a serving.
Keep the portions similar if you plan to compare each slice’s net carbs. A thin first piece and a thick second piece do not provide the same serving size.
Refrigerate or Freeze Leftovers
Store leftover slices covered in the refrigerator, or freeze them for longer storage. Wrap individual slices well before freezing to help protect them from air and freezer odors.
Freeze cheesecake at 0°F or below for best quality within about 1-2 months. Thaw frozen slices in the refrigerator, since a slow thaw helps the texture stay more even.
Use these temperature and time limits when choosing where to keep the cake. The room-temperature limit drops to 1 hour when the temperature is above 90°F.
| Storage method | Temperature | Time guidance | Packing |
| Refrigerator | 40°F or below | Use within 3-4 days | Cover the cake or slices |
| Freezer | 0°F or below | Best quality within about 1-2 months | Wrap slices well |
| Room-temperature limit | Above 90°F: 1 hour | 2 hours at other temperatures | Return leftovers to cold storage |
Sweetener and topping choices can affect texture after thawing. If a slice looks or feels different than expected, common texture and appearance problems have simple fixes.
What Can You Do About Cheesecake Cracks or Texture Problems?
You may see a crack after the cake has cooled, even if the center baked through. Look at the full cake before deciding what went wrong.
A crack alone does not show whether the cheesecake is fully baked. Cracks can come from overmixing, overbaking, or a sudden temperature change.
A crack alone does not prove the cheesecake is fully baked. Check the cake’s texture and center, not its appearance alone.
Cracks, Sinking, and Uneven Tops
Use these problem-and-response pairs to decide what to change next time. A small appearance flaw does not always affect the taste.
- Cracks: Mix gently, avoid overbaking, and cool the cake gradually.
- Sinking: Reduce extra air from whipping and avoid a sudden temperature change.
- Graininess: Try a finely powdered sweetener or improve how evenly you mix it.
- Crumbly crust: Press the crust to an even thickness before baking.
If the cake is otherwise sound, cover a crack with a low-carb topping. Sliced berries or a measured spoonful of whipped topping can hide the split.
Grainy, Soft, or Crumbly Results
Graininess may come from sweetener choice or poor mixing. Some erythritol-based sweeteners recrystallize as the cake cools, changing the filling’s feel.
A soft center may need more chilling before you judge its texture. Cutting while warm can make a set cake seem looser than it is.
A crumbly crust often points to uneven packing or a thin spot. Press the mixture across the full base with even pressure next time.
Change one variable at a time, such as the sweetener or mixing speed. You can use the recipe as written first, then adjust it to your taste.
Conclusion
A smooth, chilled cheesecake depends on gentle handling as much as ingredient choice. Careful mixing, a slight center wobble, and enough chilling all support a creamy result.
Check ingredient labels before you estimate a portion, since brands and serving size affect the net carbs. Then choose a sweetener, prepare the pan, and make the recipe once before adjusting it to your taste.
FAQ
Can I make low-carb cheesecake without a springform pan?
Yes, you can use a deep pie plate or another oven-safe pan, but removal and serving may be less tidy. A springform pan has sides that release, while a pie plate keeps its shape around the cake. Line the plate if suitable for its material, and serve slices directly from it. Check that your pan holds the full filling without reaching its rim.
Is a water bath necessary for cheesecake?
No, a water bath is optional, though it moderates heat and can help limit cracks. If you use one, wrap the pan tightly and add hot water around it. Careful baking still matters, since overbaking can dry the edges. Gradual cooling also helps the filling adjust as its temperature drops, whether you use a water bath or bake without one.
Can I use a liquid sweetener instead of a granulated one?
Not as a direct equal-volume swap, because liquid sweetener adds moisture to the filling. That extra liquid can change the batter’s texture and how firmly the cake sets. If you want to use a liquid product, choose one with baking conversion guidance and follow its directions. Avoid guessing based on the amount of granulated sweetener in the recipe.
Why does low-carb cheesecake taste grainy after chilling?
Some erythritol-based sweeteners recrystallize as they cool, which can make chilled cheesecake feel grainy. A finely powdered product may reduce that texture, but it may not remove it completely. Sweetener blends vary, so the exact result depends on the product you use. If graininess bothers you, try a different blend in a later batch and change only that ingredient.
Can you freeze cheesecake with a low-carb sweetener?
Yes, you can freeze it, though the texture may vary with the sweetener and topping. Wrap individual slices tightly to protect them from air and freezer odors. Thaw each slice in the refrigerator before serving, rather than leaving it on the counter. Creamy toppings and fruit may soften after freezing, so add fresh toppings after the slice thaws.
Can I replace sour cream in the filling?
Yes, full-fat Greek yogurt is one possible substitute, but it can change the final texture and tang. Its moisture and taste may differ from sour cream, so the filling may not feel exactly the same. Use plain yogurt rather than a sweetened flavor, and avoid changing other ingredients at the same time. That makes it easier to judge the effect in your next batch.